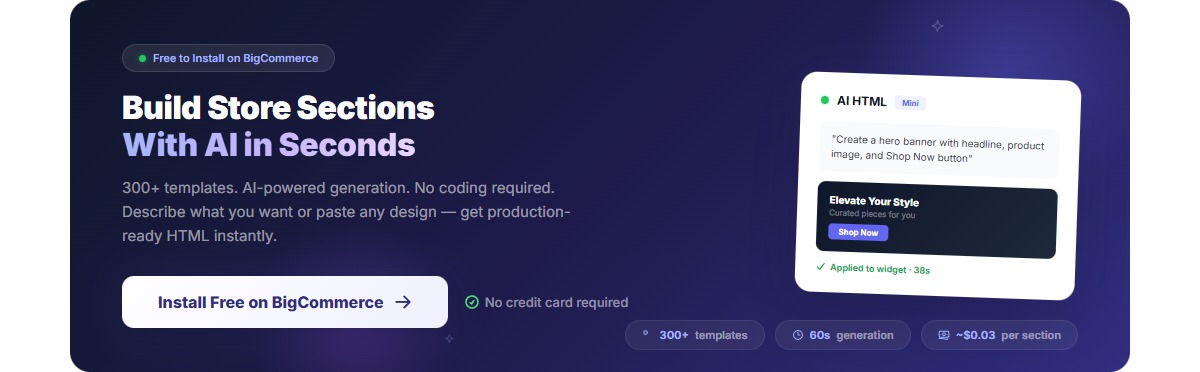
From Design Mockup to Live Store Section in 60 Seconds
You found the perfect design. Maybe it's a competitor's hero banner that caught your eye. Maybe it's a mockup your designer sent over. Maybe it's a screenshot from Dribbble that perfectly captures your brand.
Now you need to turn it into working code for your BigCommerce store.
The old way: Send to developer → Wait 3-5 days → Review → Request changes → Wait again → Finally publish
The new way: Paste image → 60 seconds → Live on your store
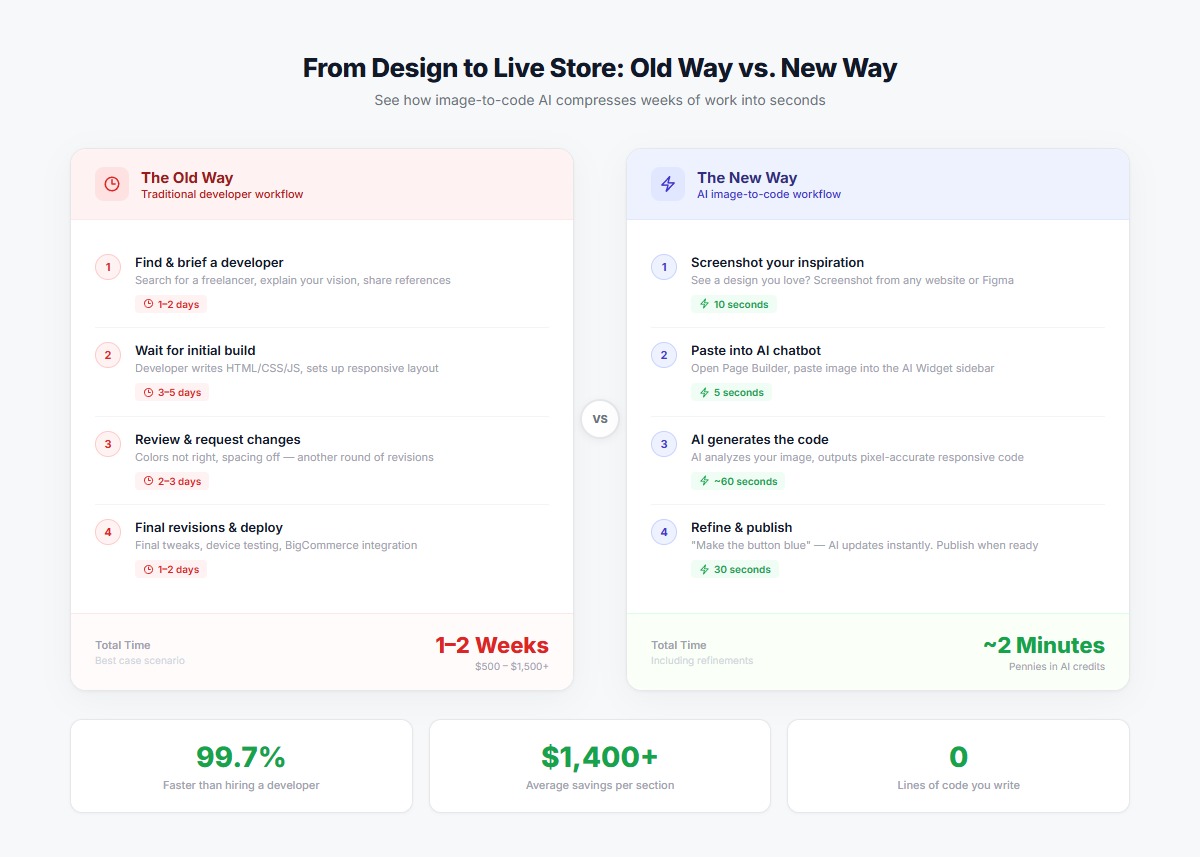 The old developer workflow vs. the new image-to-code approach — days compressed into seconds.
Here's how image-to-code AI is changing BigCommerce store design.
What is Image-to-Code?
Image-to-code is exactly what it sounds like: you paste an image, and AI generates the HTML, CSS, and JavaScript to recreate it.
Not a rough approximation. Not a "close enough" interpretation. Pixel-accurate code that matches your design.
What you can paste:
- Screenshots from competitor websites
- Figma or Sketch mockups
- Dribbble or Behance inspiration
- Photos of hand-drawn sketches
- Screenshots from your own store (to replicate elsewhere)
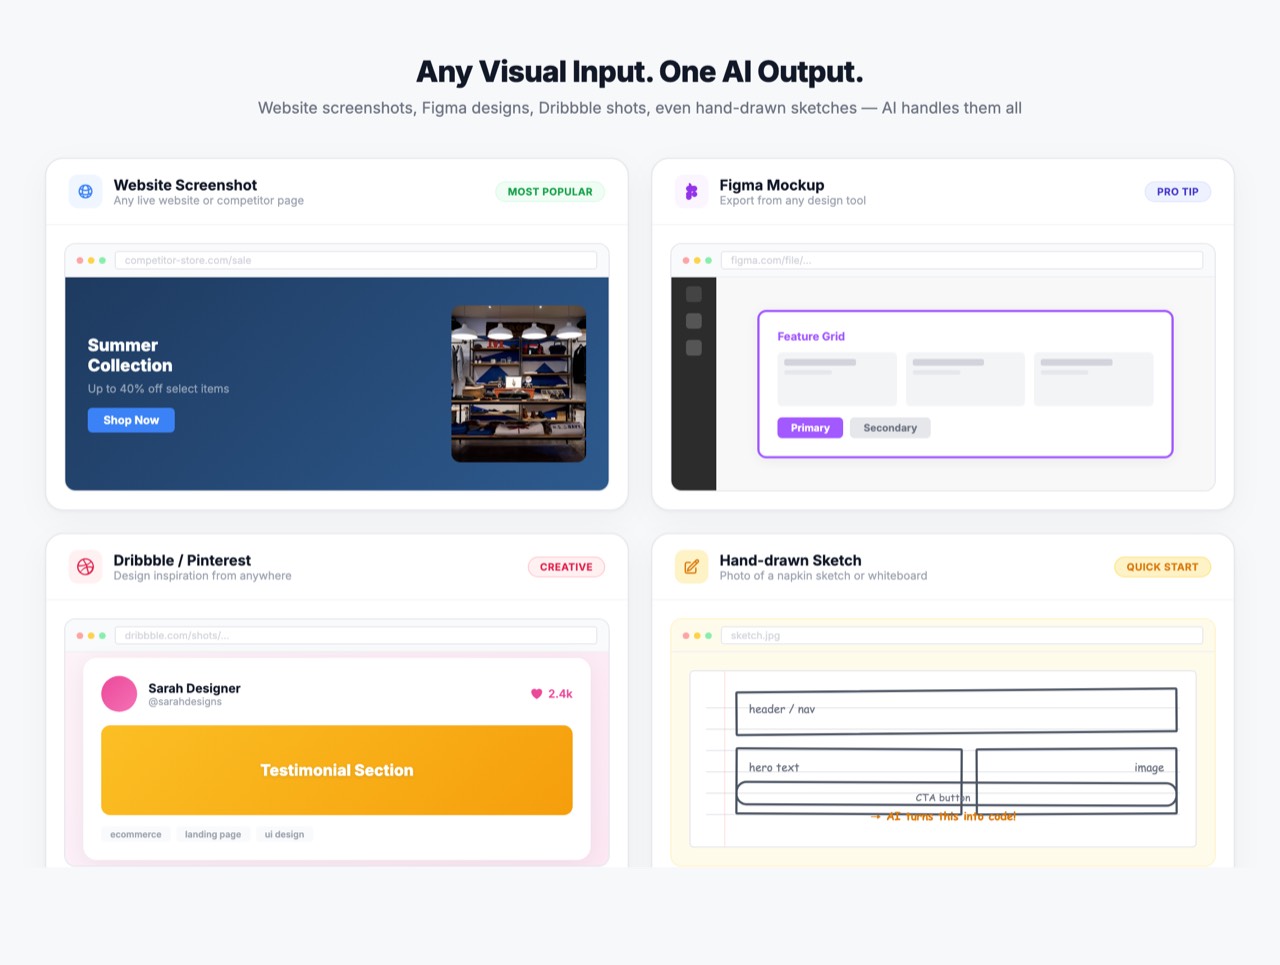 Any visual input works — from polished Figma mockups to hand-drawn sketches on napkins.
How It Works (Step-by-Step)
Step 1: Find Your Inspiration
Take a screenshot of the design you want to recreate. This could be:
- A hero banner from a competitor's site
- A product showcase you admire
- A testimonial section that looks professional
- A promotional banner with a countdown timer
Pro tip: Crop the image to just the section you want. This helps the AI focus and reduces processing time.
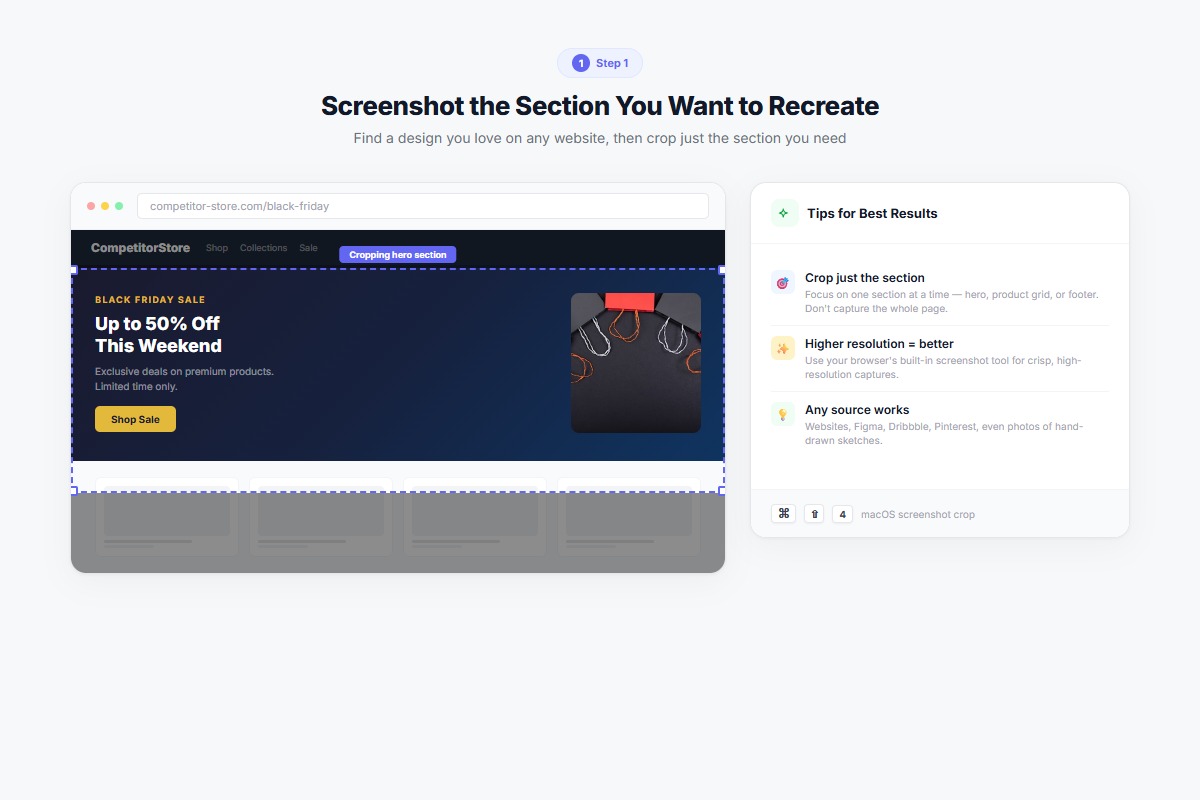 Crop to just the section you want — the AI works best with focused input.
Step 2: Open the AI Chatbot
- Install the AI HTML Widget if you haven't yet (free)
- Add the AI HTML Widget to your page in Page Builder
- Click the purple AI button to open the chatbot sidebar
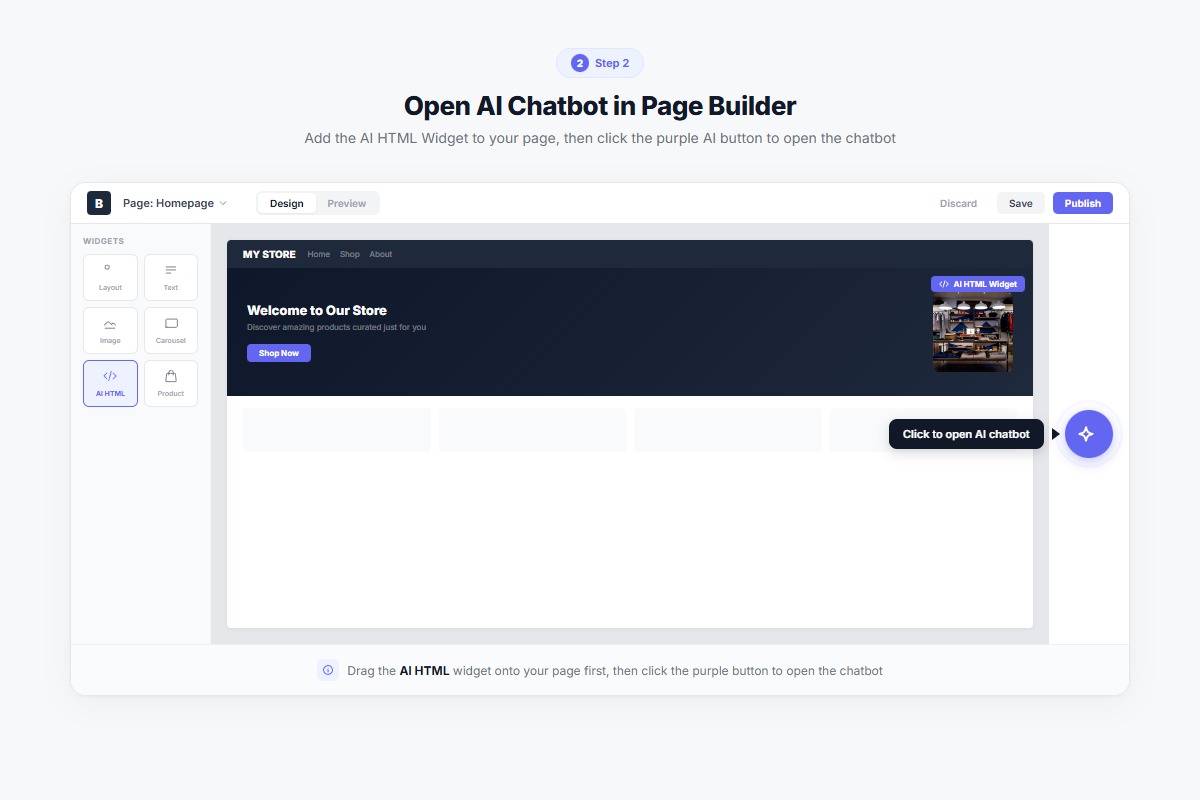 Click the purple AI button in Page Builder to open the chatbot sidebar.
Step 3: Paste Your Image
Simply paste your screenshot directly into the chat:
- Windows: Ctrl+V
- Mac: Cmd+V
A thumbnail preview will appear above the input field.
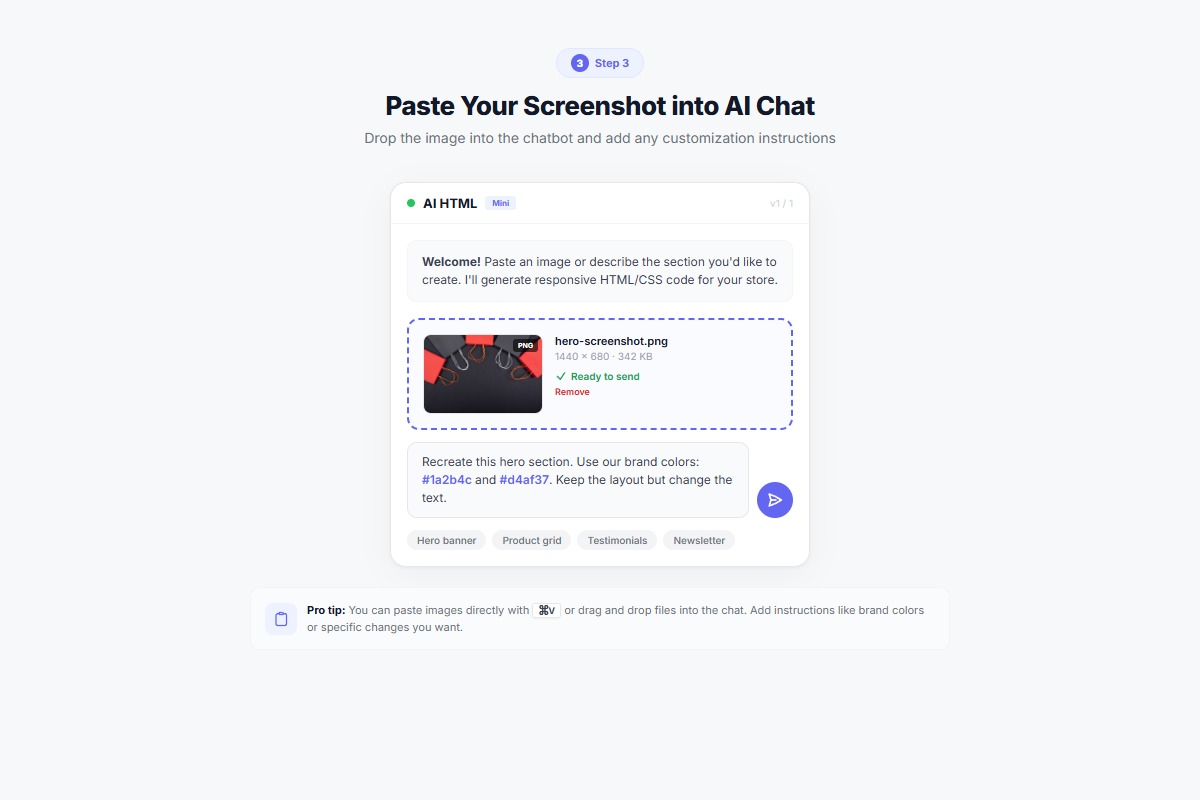 Paste your screenshot — a thumbnail preview confirms the image is ready to send.
Step 4: Add Context (Optional but Helpful)
Along with the image, you can add a prompt like:
- "Recreate this hero banner exactly"
- "Build this section with my brand colors (#1a73e8 for buttons)"
- "Make this testimonial carousel with 5-star ratings"
Step 5: Watch the Magic
Click Send. In about 60 seconds, you'll see:
- The AI analyzing your image
- Code being generated in real-time
- A live preview appearing in your widget
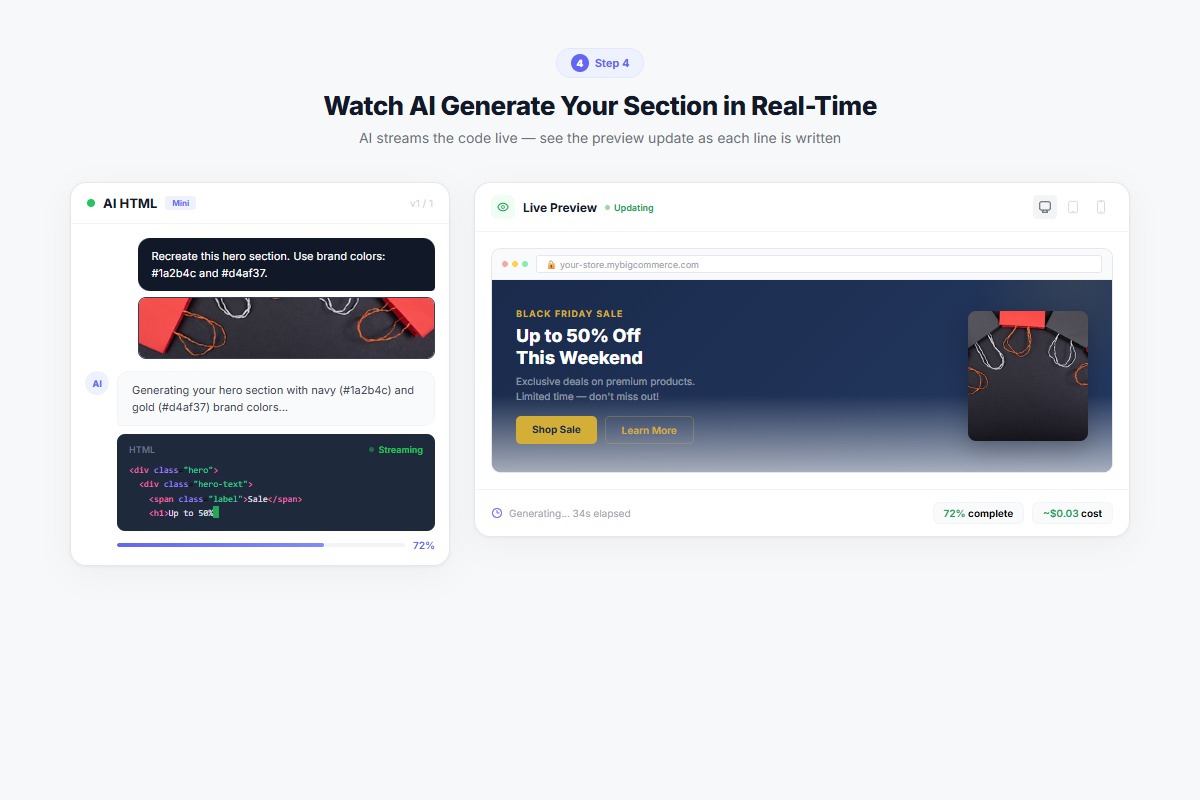 Watch the AI analyze your image and generate a live preview in real-time.
Step 6: Refine and Customize
The first version is usually 90% there. Fine-tune with follow-up prompts:
- "Make the button larger"
- "Change the background to white"
- "Add more padding on mobile"
That's it — 6 steps. Screenshot → Paste → AI generates → Refine and publish. The entire process takes about 60 seconds.

Real Examples: Before and After
Example 1: Competitor Hero Banner
Input: Screenshot of a competitor's Black Friday hero banner with countdown timer
Prompt: "Recreate this hero banner. Use our brand colors: navy blue (#1a2b4c) and gold (#d4af37)"
Result: Matching layout with brand colors, working countdown timer, responsive design
Time: 47 seconds
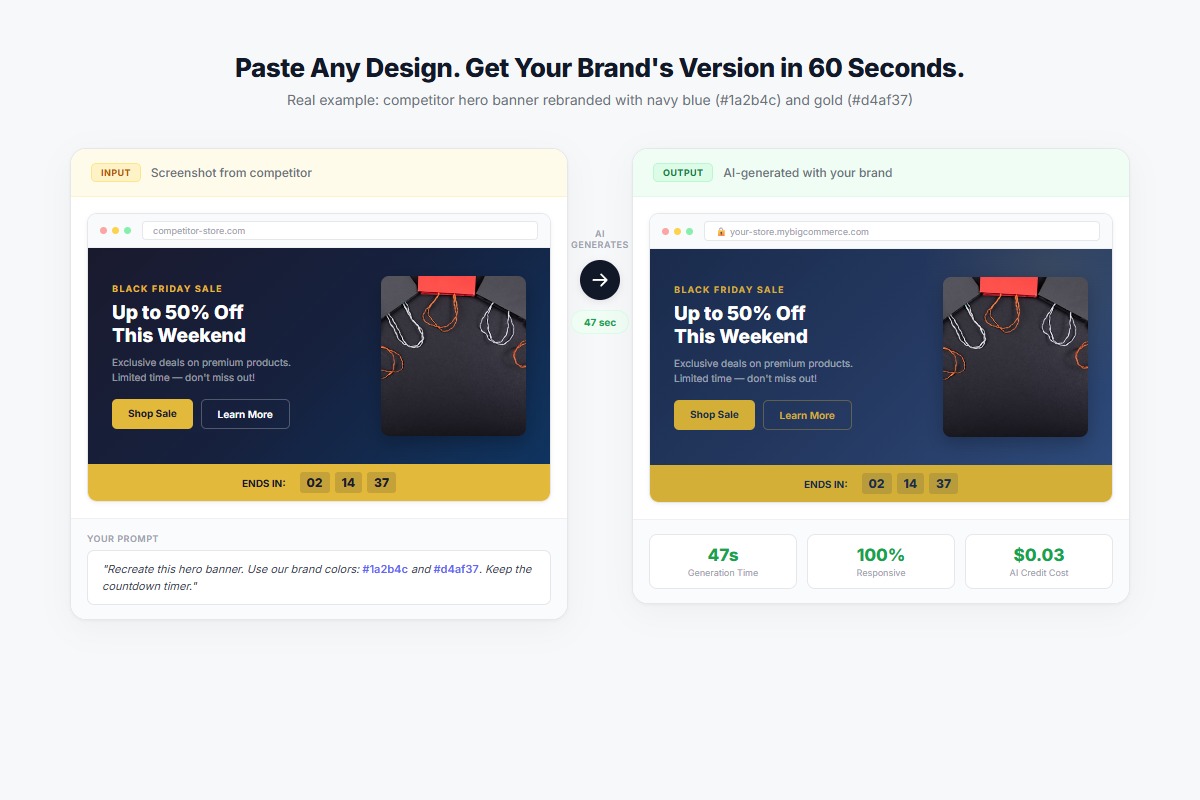 Left: original competitor design. Right: AI-generated version with custom navy & gold branding — 47 seconds.
Example 2: Figma Mockup
Input: Designer's Figma export of a feature grid section
Prompt: "Build this feature grid exactly as shown. Make it responsive."
Result: Pixel-accurate recreation with hover effects and mobile stacking
Time: 52 seconds
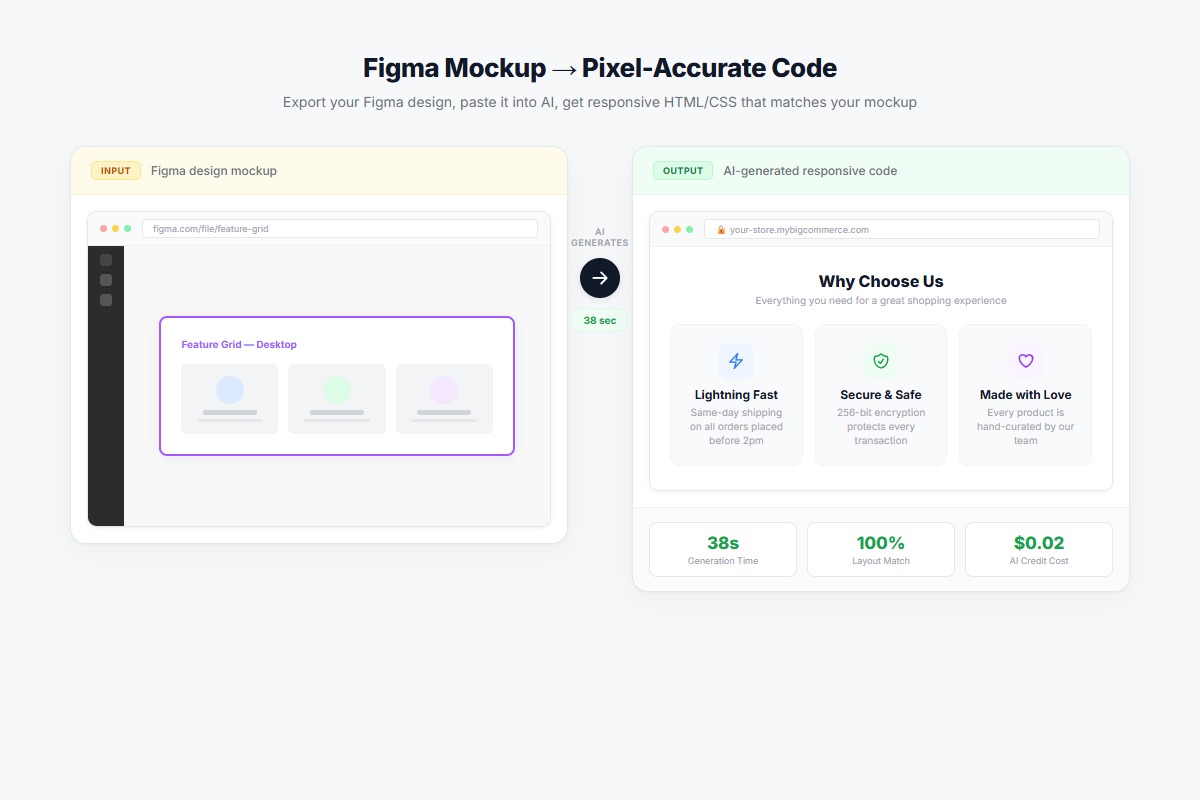 Left: Figma export. Right: pixel-accurate AI recreation with responsive behavior — 52 seconds.
Example 3: Dribbble Inspiration
Input: Screenshot of a testimonial carousel from Dribbble
Prompt: "Create this testimonial slider. Include navigation arrows."
Result: Animated carousel with smooth transitions, touch-friendly on mobile
Time: 68 seconds
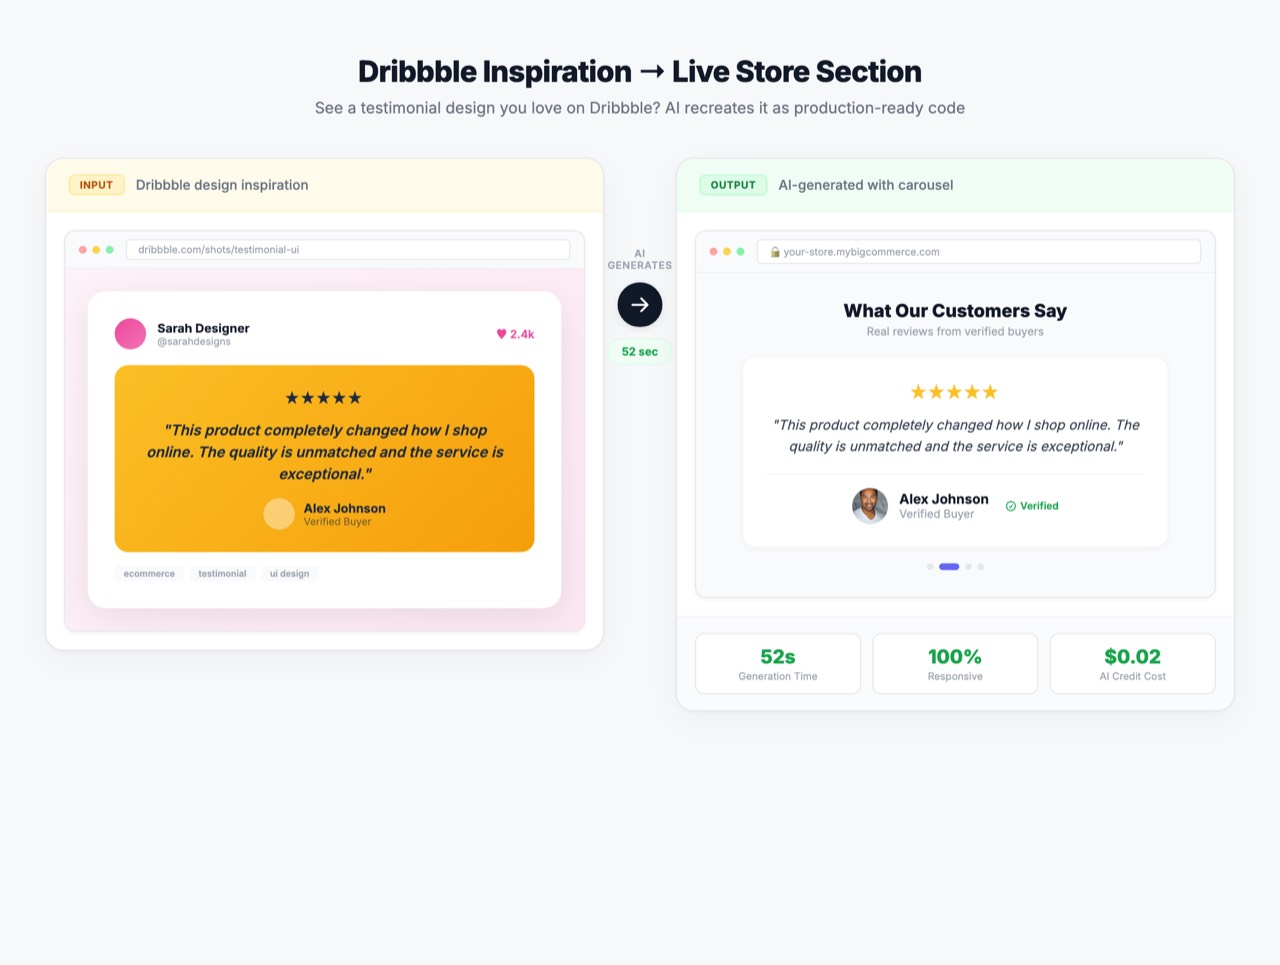 Left: Dribbble inspiration. Right: fully functional carousel with smooth animations — 68 seconds.
Why This Matters for Store Owners
You Don't Need to Describe What You Want
The hardest part of working with developers is explaining your vision. With image-to-code, you show instead of tell.
You Keep Up with Trends
See a design trend that's working for competitors? Implement it the same day, not next month.
You Iterate Faster
Don't like version 1? Paste a different reference image. Try a new direction. Experiment without the time cost.
You Save Thousands
A developer recreating a complex design might charge $500-1,500. Image-to-code costs a few cents in AI credits.
The math is simple: One custom section from a developer costs $500+. Image-to-code generates unlimited sections for pennies each.
Tips for Best Results
1. Crop Your Screenshots
Don't paste a full webpage. Crop to the specific section you want.
2. Use High-Quality Images
Higher resolution = better AI understanding = more accurate code.
3. Add Specific Instructions
"Recreate this" works. "Recreate this with responsive behavior for mobile" works better.
4. Iterate with Follow-up Prompts
First pass not perfect? Tell the AI what to change. It remembers the context.
5. Start Simple
Begin with simpler designs (hero banners, feature grids) before complex interactive elements.
What Store Owners Are Saying
"I showed a client a competitor design during our call. By the end of the meeting, I had a working version on their staging site. The look on their face was priceless." — Agency Owner, 15+ BigCommerce Projects
"My designer sends Figma mockups. I used to wait a week for development. Now I paste the export and have it live in minutes." — E-commerce Manager, Fashion Brand
"I've been asking my developer to recreate a section for 3 weeks. Pasted the screenshot. 60 seconds later: working code." — Store Owner, Home Goods
What Design Will You Recreate First?
Every day you see designs that would look great on your store. Now you can actually use them — in 60 seconds, not 2 weeks. Free to install, and you only pay for AI credits when you generate code. Most sections cost less than $0.05.